Supplies needed:
1 yard of fabric your choice
1 ugly ceiling fan
I drum shade
1 yard of trim
DecoArt acrylic paint
stencil
wire
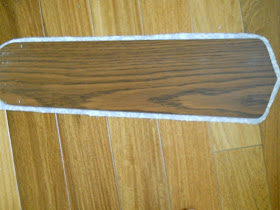
This is what the fan looked like. I already took one of the glass globes off here. Start by stripping it down. Take off glass globes and unscrew fan blades.
Start by applying Mod Podge to the blades and lay fabric down to adhere.
Wrap fabric around edges. Cover all the blades and let dry firm. When all the blades are covered and dry start applying more Mod Podge over the top off the fabric. This is very important because it allows the fabric to be wiped down when dusty.
Paint with DecoArt Black and stencil a drum shade. Any shade will do as long as it clears your light bulbs when hung. I added pretty fringe to the bottom of the shade by hot gluing. Attach the stenciled drum shade by wiring it the the screws that hold the globes in.
Paint DecoArt Black and stencil with random pattern. Any DecoArt color will do to match your fabric
Wire around screw. It should look like this.
I had to cut one of the bars to get it to fit but it worked fine. I attached the blades to the fan.
This is fabulous!!! I love it! My fan went from an ugly eyesore to this beauty! The best part is you can flip the fan blades over for a new look with different fabric! You can even paint the metal if you would like.
I love this out-of-the-box idea!
Frumpy Fan
Fantastic Fan


Great job Deneen - LOVE it! Off to vote. :o) Good luck! Robin
ReplyDeleteWow, that is the best looking ceiling fan I've ever seen! You did a fantastic job, transforming it into a chic fixture! Love it.
ReplyDeleteI love this idea for the ceiling fan :)
ReplyDeleteI always hate that ceiling fans are the ugly fake wood look. You made yours a piece of art!
Now that is fantastic...we have ugly ceiling fans that I hate...what a great idea.
ReplyDeleteoh this IS a great idea Deneen!
ReplyDeletelove the fabric you chose!
Thanks so much for linking up @ Inspire Me Fridays!
Fantastic (saw this on Inspire me Fridays) x
ReplyDeleteLove it! Oh the possibilties! Beautiful job.
ReplyDeleteYou are a genius! I love it! It would have gone sooo well in my daughter's bedroom that I just made over into a Paris theme...
ReplyDeleteThis triple F is just gorgeous!!! I had to vote for your fan...
ReplyDeleteBlessings,
Nádya
I just voted for you. This is truly unique and you have just opened up a whole new outlook on fans. 90% of them are boring and just ugly. You have discovered something professional designers and manufacturers haven't done! Seriously, you need to hook up with a biz person and sell these! I have a designer friend I could talk to - she just started her own furniture line. Let me know if I can pass along your info. You are amazing!! Oh, and if you do one for a kids room email me and I'l feature it on my children's decor blog.
ReplyDeleteNan I cannot reply to you because you have a no reply on your settings and you didn't leave me a link so if you see this please send me a way to get in touch with you.
ReplyDeleteI love this project Deneen!
ReplyDeleteAwesome idea--I love your new look; the shade is pretty attached the way you've shown--creative!
ReplyDeleteYour ceiling fan looks marvelous! It would look great in my sister's house. I'm sending her the link so she can make one for herself. Thanks for sharing!
ReplyDeleteVery classy! Love the black and white. Great job! xo
ReplyDeleteSO cute!! I have that exact ceiling fan and I'm definitely going to give this project a whirl this weekend. Or a spin. Ok I'll stop now with the fan references. Seriously, very adorable and inventive!! :)
ReplyDeleteThis idea is so fantastic. I love to see how people use decoupage techniques to brighten their homes, plus as an eco-nut the idea to taking something old and making it new is superb. Great job.
ReplyDeleteWow.. that looks fantastic. Who would have thought you could make so much difference to a ceiling fan!!! Well done.
ReplyDeleteI really love the style and design that you have put on your blog.Really interesting highly recommend fans lover.
ReplyDeleteWith the fan project, it's really hard to u/stand just how you attached the shade (and kept it in the center), when all you had to say about that aspect was, "Wire around screw. It should look like this. I had to cut one of the bars to get it to fit but it worked fine."
ReplyDeleteI really like your writing style, great information, thank you for posting
ReplyDeletebuy best mist fan supplier in dubai 2020