
Every now and again a project comes along that I fall in love with. This is one of those!
I usually don't go for waterfall style furniture. They just aren't interesting to me. This one had something about it. Loved the shape and the carvings.
I knew this would be the perfect piece to take to Bella Rustica at the end of the month or at least that is what I thought!

I winded up selling this before I even started! One thing about not painting something first is the client has the option to stylize the piece to fit them. I had already decided on paint color and chicken wire.
The rest ...the scripture...was their idea!
Ecclesiastes
"There is an appointed time for everything. And there is a time for every event under heaven ~
2 A time to give birth, and a time to die; A time to plant, and a time to uproot what is planted.
3 A time to kill, and a time to heal; A time to tear down, and a time to build up.
4 A time to weep, and a time to laugh; A time to mourn, and a time to dance.
5 A time to throw stones, and a time to gather stones; A time to embrace, and a time to shun embracing.
6 A time to search, and a time to give up as lost; A time to keep, and a time to throw away.
7 A time to tear apart, and a time to sew together; A time to be silent, and a time to speak.
8 A time to love, and a time to hate; A time for war, and a time for peace.
I couldn't fit it all but found some lines to add to the piece.
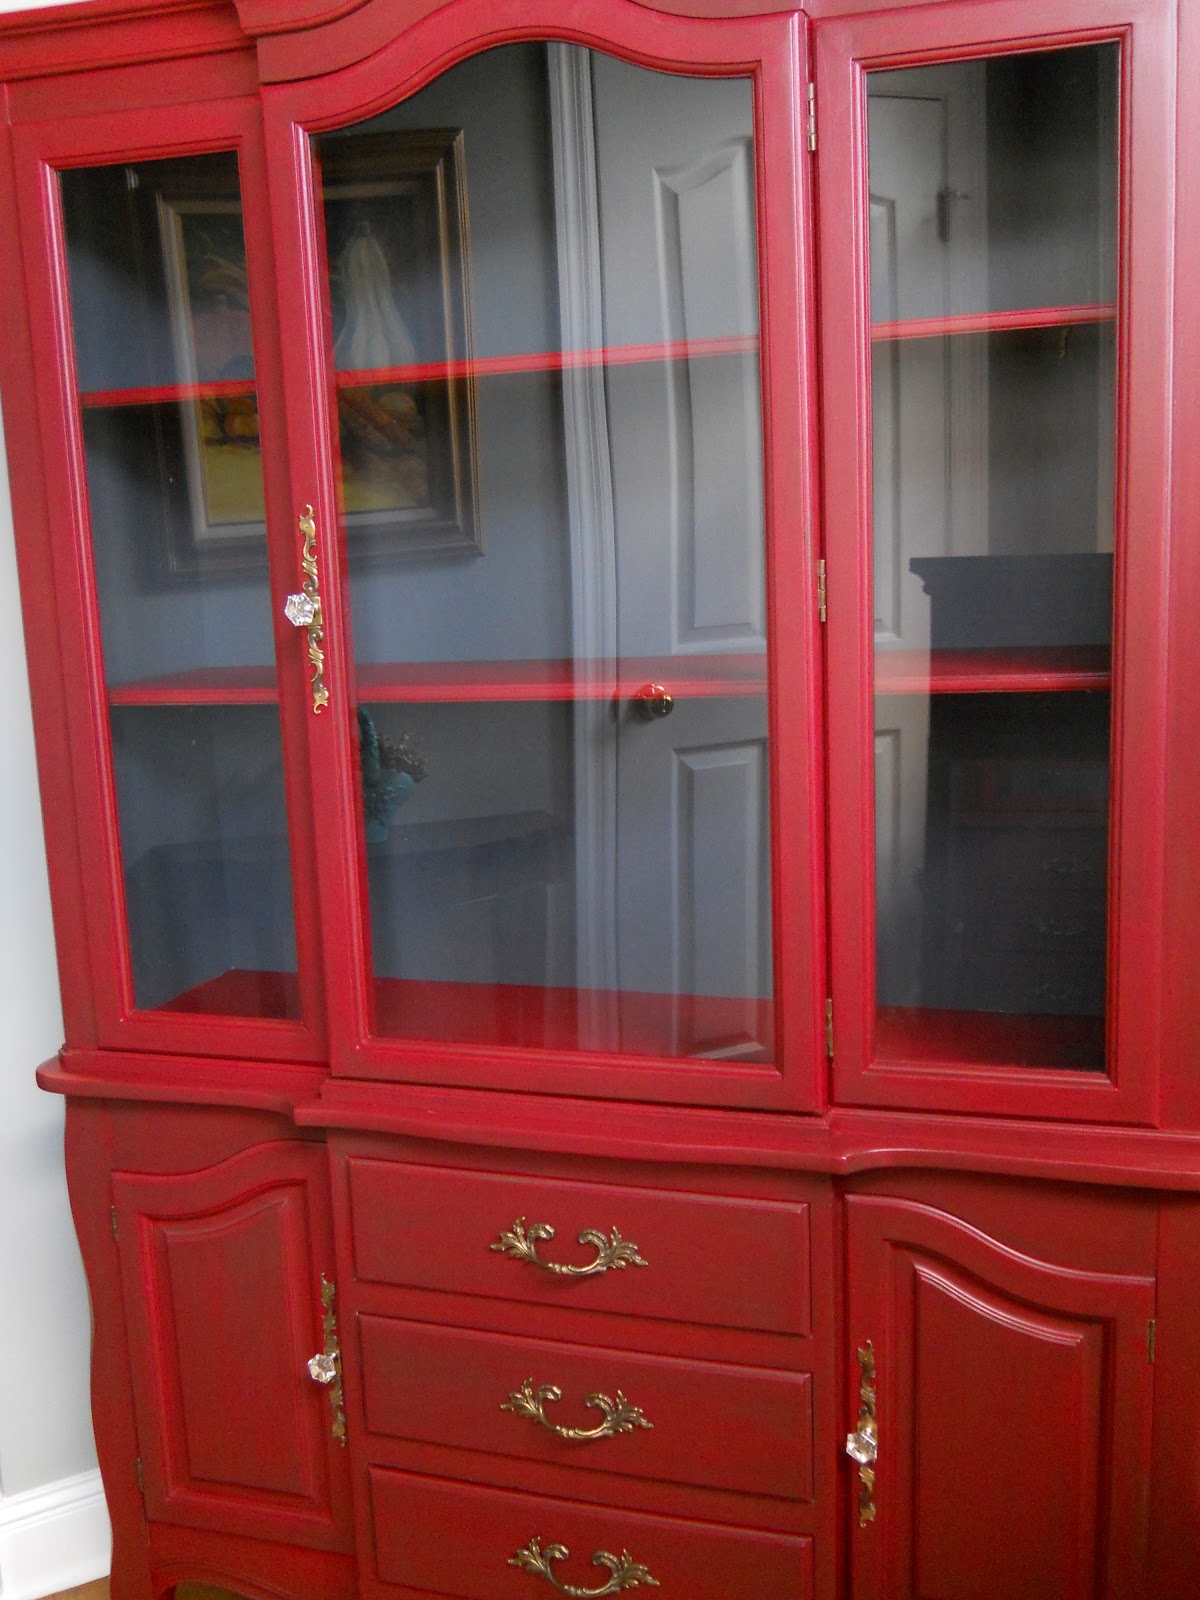
The best thing about this hutch was the petite size. It would be able to fit in almost any space!
I like the smaller hutches. I did a red one with papers, but it was an open style front.
I like the smaller hutches. I did a red one with papers, but it was an open style front.
This is how it started


I knocked out the glass and attached chicken wire. Painted it with Annie Sloan Paris Grey and the inside in old white. Waxed with both clear and dark. Then painted the words.
I kept the hardware since they looked good and dry brushed over them.

The words on the inside I wanted to keep subtle. I used white with a small outline in black. Heavily waxed the inside to look old.

This is what it looked like before the outline.

Just a line on the front in the perfect spot!

I really loved the finish product. I don't believe the pictures do it justice.
It was a huge transformation!
What do you think? Have you ever used chicken wire to replace the glass? Do you think I was crazy getting rid of perfectly good glass?
Remember the Before.....?
What a transformation huh?
The client loved it!
What do you think?


