A few weeks ago I designed a booth for a
bridal show. It was an outdoor theme and we had to come up with inexpensive decor. Making anything that costs next to nothing is always fun when it turns out so pretty.
Our colors to work with were yellow and blue. There were three different types of flowers created.
Small yellow and white roses
This is the rose before I painted it with ink lines and everything lol!
Large Brown Paper Roses
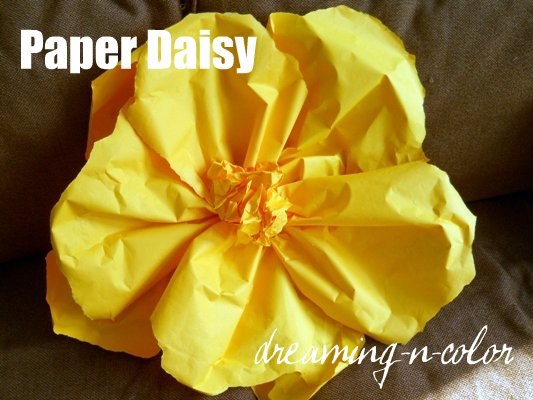
Colorful blue and Yellow Daisies
I am going to show you how to make the daisy flowers we hung on the wall.
Materials:
Solid color paper (any kind will work)
stapler
hot glue
I began roughly cutting strips of paper. The glory of this is it does not have to be exact!
Then I cut to the size petal I wanted which decides the size of the bloom. I cut mine in thirds.
I then began to tear of the ends to make a rounded edge. Again nothing exact.
Then I gathered the paper on the straight edge and pinched together and stapled.
This will form the petal. I made four individual ones/
I then stapled all four together. This will form the first layer.
Again there is no reason to be exact. This adds to the character of it.
Do the same steps to make another layer. With this flower you should have two layers.
Hot Glue one layer on top of the other.
Gather all scraps that you would normally throw away and crumple in a ball
This becomes the center of the flower. Glue to the center and you are done!
These make a great party decoration! By adding this to our curtain wall it enhanced the colors of the booth. It gave it an Anthropologie feel.
Let me know what you think! If you would like to know how to make the others let me know and maybe I will do another post.
Now that spring and summer approach we will have beautiful fresh flowers but this is a great inexpensive alternative!


